Thursday, May 30, 2019

How to mount a Surly Front Rack on the Kona Sutra


This is the answer to a question on how I mounted the Surly Front Rack on my Kona Sutra 2019, that was asked by a reader in my review of the bike post.

Basically I following these 2 guides that I found from Surly.

And this PDF: https://ja.surlybikes.com/uploads/downloads/Surly_Front_Rack_Instructions.pdf

The tricky part was to figure out what plates to use.

  • Lower offset sliding plate
    • for the lower mounting
  • Upper offset sliding plate
    • For the upper mounting 

Also, the Kona Sutra came ready with mounting points on the fork, so that is a fixed point as well.

The lower mount point for front racks on the Kona Sutra

Lower mount point of the Surly Front Rack close up


Upper mount point of the Surly Front Rack close up

The hardest part was to actually straighten it out once all points were in place. I.e. the rack tends to move around when you try to adjust it by loosening, adjusting and tightening. But that was solvable with some patience.


So, hope this helps someone out there!


Disclaimer
I bought this product myself and this is my opinion on them. I am in no way affiliated with the manufacturer of this product. Neither did I get paid to link to any site that is mentioned in this post. 

Sunday, May 5, 2019

Brooks B17 Saddle First Impressions


It is time to write a little about my first impressions with the Brooks B17 Saddle that came with my Kona Sutra adventure bike!

First of all, I have had trouble finding a comfortable saddle during all of my cycling years. I've grown used to the discomfort and actually just not thought about it more then it being a part of the sport.

The Brooks saddle was one of the reasons that I went for the Kona Sutra as it was included in the price and because I've heard so much positive about it.

I am using padded cycling shorts with my Brooks saddle.

Out of the box

Out of the box I followed the instructions and used the included profide both on top and on the underside. Let is stay for a day and wiped the top with a dry rug.
2 days later I went for my first ride and my initial thought was, should it be this slippery?
For my second ride, the slipperiness had vanished and I was able to enjoy the ride.

Initial thought, this saddle is really hard. I mean, my racer saddle is hard but this is harder.

3 day bikepacking trip, ~25 hours in the saddle over 480 km

Picture showing the Brooks B17 Saddle on a 2019 Kona Sutra adventure bike outside a school in Godegård, Sweden.

The initial test, commuting to work is fine, about one hour each way. I did some longer rides up to 3-4 hours as well with no problems. But last weekend we went on a 3 day bikepacking trip just to test our gear and our own limits in preparation to this summers Stelvio 2019 trip (that we had to cancel thanks to me not being fit enough yet after chemo.)

I can't really say anything else then that I am surprised of how good the saddle worked. No soreness, no nothing. From that point of view I could have kept on going for an even longer period.

First impression conclusions

I am happy with the saddle and would recommend it to anyone.. I am even thinking about buying one for my racer.. But we'll see.


Disclaimer
I bought this product myself and this is my opinion on them. I am in no way affiliated with the manufacturer of this product. Neither did I get paid to link to any site that is mentioned in this post. 

Tuesday, April 30, 2019

My first bikepacking trip, general repetition for Stelvio 2019


OK. So after all this planning, the time has come to go on my first bike-packing trip. The plan is to be away 2 nights.

So this will be a general repetition for the Stelvio 2019 trip. Meaning that I will bring along all the stuff that I plan to bring on the cross-continental trip. Hopefully I'll weed out some of the stuff and maybe figure out some gear that is still missing.

Planning

Goals of this trip

  • Travel around 160 km per day for 3 days
  • Wild camp at least one night
  • Eat and drink nice stuff whenever we want to

Packing list

  • Camping gear
    • Tent
    • Sleeping bag
    • Thermo sleeping mat
    • Canister stove
    • Toilet paper
    • Freeze dried food, 2 meals for supper
    • Toothbrush, toothpaste

  • Tech
    • Phone, for navigation, photographing, posting stuff online etc.
    • Action camera, cheap one from wish.com that I found for 5€
    • Battery pack 20 000 mAh
    • Garmin Fenix 3, for logging the ride
  • Bike repair tools
    • Quick chain 
    • Extra inner tube
    • Derailleur hanger
    • Chain breaker
    • Allen keys
    • Extra spokes (1 short and 1 long)

  • Clothes
    • Extra pair of bibs
    • Extra jersey
    • Arm warmers
    • Leg warmers
    • Bike cap
    • Neoprene gloves
    • Neoprene shoewarmers
  • Bike gear
    • Helmet
    • 2 x 650 ml bottles of water
    • 500 ml bottle of water
Total weight: 11 kg
Total bike weight: 14 kg
My weight: 107 kg (oh damn)
Total: 132 kg...

Route plan

I  used Strava to plan a route that will be around 160 km per day. For 3 days that's a total of around 480 km for this weekend. 
Also checked some of the roads with Google Street View. I want to stay out of the Swedish 2-1 roads with wires in the center and sides. 90 km/h roads with very little room for errors. Don't want to end up in the wire fence with force..

Stage 1 from Tidan to the woods north of Nora


We started out in the morning, my mate had already ridden the 30 km from Skövde to me and we set out on a little bit of gravel road until reaching road 200 that we planned to continue for some time.
After 500 meters, the first truck came and used its horn and we quickly decided to take an alternative road instead with less traffic. A nice and welcoming start of the journey.
Taking a quick break in Töreboda to recheck gear
In Jonsbodarna we switched to follow the Göta Kanal on its gravel/sand bikepaths to Töreboda where we stopped and ate a banana.. One hour in for me and two for my friend.
We continued along the canal to Norrkvarn and from there crossed the E20 to more unpopulated roads.
The roads where good and we made a good time, saw a few snakes... (I have a real snake fobia) Luckily they were all dead.
Road-signs in central Gullspång
In Gullspång we took a wrong turn and didn't notice until we had climbed a hill, so we turned around and rolled back into town to buy some food and eat lunch. Ended up buying pasta sallad at the local ICA shop.
Lunch in Gullspång day 1
After lunch we hit some bad roads that really took some effort to push through, smaller paved roads in the countryside that are badly maintained.
Once back on a bigger road we climbed our first longer hill on the trip, so long that we decided to stop and take a picture of it. At least we had that behind us!
Obligatory documentation of the first longer climb on day 1 of our trip
After some hours on that road we stopped in Åtorp at a local café and took a real Swedish coffee break (fika).
Fika in Åtorp
So far we were making good time, we passed Degerfors with no real issue. Hit the old road from there towards Karlskoga and hit a long climb almost directly, followed by a long decent all the way to Karlskoga.

Before the trip we had found that we would pass a real nasty hill in Karlskoga, 18% according to strava. So mentally prepared we started on that climb, but in reality it was not near 18%. But I had to use my smallest cog on the Kona Sutra to be able to beat it.
From the beginning we had said that there will be no prestige on this trip, hills should not be sprinted but taken in a pace that is energy efficient.
Feeling a little better after having beat that 'Svartbacken', we continued still in good spirits.
Once we hit road 243 everything changed. The road was wide, the asphalt was rough and the hills were real long and after a hill, there was another... and another. After a few of those all hope of getting to Nora before the ice-cream factory closed for the day vanished. It was pure survival. We re-did the plans, we even decided to take in on the local camp-ground in Nora just to not have to look for a place to pitch a tent.
That road, the 243 from Karlskoga to Nora took away my bikepacking naivity.

After 2 hours we passed through Gyttorp, the sun was on its way down and we joked a little that we still had energy.. Ten minutes later the man with the hammer came for me and the last downhill into Nora was a little risky.
We rode to the campsite, the reception was closed for the night. We looked at google for places to eat and found a pizzeria.. Rolled there, ate some junk-food and it was good!

Finally in Nora

While we were looking at maps we noticed that the ice-cream factory was next door to where we sat. The mental blow of that was fun.
After that we found a Circle-K where we could fill our water bottles and climbed back out from Nora to a potential campsite for the night.
Tents pitched and ready for bed. First day of the trip completed! Still having fun!

We pitched our tents and called it a day.


Stage 2 from the Nora woods to Berg outside of Linköping


After a night with muscle-fever and quite a lot of sweating I was surprised to find myself in quite good form in the morning.
A brand new day after a night of muscle fever
We packed up the camp and made sure that no trash was left at the scene and hit the road directly without any breakfast as there was a fire ban in the region.

The second stage started with an unplanned 'shortcut'. As we had found a better campsite for the night then the planned one north of the city, we decided to ride a gravel road and intercept the planned route a bit to the south.
Almost directly we were hit with an average 3% ascent.. And it kept on going.. and going... As it was a gravel road some parts were really steep. A rough awakening and the put the body to working mode directly.
Once we hit paved roads, we rolled into Örebro in no time and ate breakfast at Circle-K (not sponsored, just happened to be there.)
Breakfast day 2, coffee, 2 egg and "falukorv" sandwiches and a powerade.
I really liked the cycle-roads in Örebro, really broad and the bikes rolled really nicely.
From Örebro we rolled through Kumla and Hallsberg in no time, the roads were nice and we really enjoyed the riding. The road planners had kept a mind on cyclists.

After Hallsbergs the days second longer climb started. We took it in our own pace, meaning that my riding partner disappeared and I continued on the small cog.

In Estabo we ran into another climb and at that point it also started raining a little and the temperature dropped.
Stopping for lunch in Mariedamm. Bring your own lunch as there are nowhere to buy stuff between Hallsberg and Tjällmo

A few hours later we arrived in Mariedamm where we ate lunch consisting of a sandwich and a snickers and pushed on.
At this point it was a little cold and the energy boost from lunch made me push a little harder in some uphills and I think that I did something bad here as my knee started to feel a little weird.
Here we also found a sign saying that we should take another road if possible, we looked at each other and the map and found that other roads would add an extra 40 km to the day. So we deemed it impossible to take another road and road the planned one.
After a while we found out why the sign was up. Evidently forest fires started early in Sweden in 2019.

Forest fires between Mariedamm and Godegård
From Godegård we took the road towards Tjällmo. After some riding we ran into another sign saying that the road was closed ahead. Find another route.
And again, we consulted our map and found that it would add another 40-50 km to the ride. So we asked google maps to find an alternative, and it did based on us riding bikes.

We took a gravel road downhill to a house, rode through their back-yard to a tractor-trail that lead to a forestry road that was in a really bad shape. I think we rode that for 10 km until we descended from the highlands back to farming country and a paved road to Tjällmo. An extra 2 km to the trip and an experience richer. Damn I love my Kona Sutra, it has really taken me through all terrain that I've thrown it against!

In Tjällmo we stopped to feed. Starving.
The last leg of the day was to Berg and a ice-cream shop there. But after one of the most boring roads I've ridden (Tjällmo-Berg), we finally arrived and the place had closed for the day so we rode off to find our place to camp before it turned dark.
Day 2 camp site, sleeping in the tents instead of the cabins just because this is a general repetition.
The day felt better, even with the rain. Energy never ended mostly because we ate at better intervals.

Stage 3 from Linköping back to Tidan outside of Skövde


Last day of the trip. Started with porridge before hitting the road.
Day 3 breakfast, porridge with nuts, almonds and raisins.
The first 5 km were hellish thanks to the head-wind but then we turned a little and got it more from the side and it was survivable.

Our first stop was Borensberg where we bought food for the next few hours riding through the no-shopping-region of northern Östergötaland. In the morning we had found another road that we could use instead of the closed one from the day before that would only marginally alter the planned distance.
Once we arrived at the junction, and noticed that it was gravel our mood sunk. It was bad gravel, and 1 km in there was a gravel climb up back to the highlands that was really steep with all the packing on the bike. I had to really put in an effort to get up.
The gravel road to Degerö
But once we had passed that climb the gravel road turned really nice, even nicer then most of the paved roads we had ridden so far. It was a dream to roll through the forest and we made good time. Once in Godegård we stopped and ate the food we bought in Borensberg before hitting the road to Zinkgruvan.

The road to Zinkgruvan was hell. Hell on earth. It was hot, sun was burning, the asphalt was burning, the rocky sides of the road were radiating heat and the road just went up and down like a roller-coaster. A roller-coaster with no fun, the climbs were hard and the downhills were really short.

After Zinkgruvan the road was better, the climbs were longer but not as steep and the downhills were really long, plenty of time for my pulse to reach normal levels before the next climb.

Newly opened Sibylla in Askersund served us burgers for lunch!

In Askersund we stopped for lunch, again just junk-food. We took some time to just relax and fill water bottles and re-secure everything on the bikes before hitting the next leg of the day. The road through Tiveden...

And it began again. Long climbs followed by short downhills. After a while the downhills became longer but there was still that question in my head of how many of these climbs are there? So I decided to conserve my energy and safe it all the way. So this part took a really long time, just steady climbing in low gears and coasting downhill and repeat
Here I almost hit a live snake as well, yikes.. and rolled over a dead one...
The Kungsbacken climb in Tiveden. 
Well, the rolling hills just continued. But once we hit Undernäs we were on familiar roads again, almost home. So here we just started pushing up the pace and made some of the best lap times (5 km) of the whole trip. I burned through all the energy reserves that I had on the last roads back home. And once home I barely knew my own name.

A trip to remember! And damn it was hard and fun at the same time!

What I figured out about my gear

Gear that didn't make it:

  • The only obvious thing that will not cut it to my next trip is the footprint of the MSR Elexir 2 Tent... It's there so that you can raise the tent without the inner tent and for protection of the inner tent.. But in reality you can just use the tent without it and be happy... 202 grams removed.
  • Maybe pour the sunscreen into a smaller tube


Gear that I wish I would have thought of:

  • A bag on my frame for easier access stuff like snacks while riding. 
  • We will need to pack a little bit smarter and not bring doubles of stuff on our next trip
  • Dish-soap

Other conclusions

160 km and 1 km elevation per day was really pushing my limits. It has taken me 2 days to recover to almost normal function afterwards. The thought of doing this for three weeks is making me re-think my Stelvio plan. The trip is something of a grand tour of mine and I want to do it right. Not stress to the next campsite before nightfall. 160 km is pushing it, I think that a reasonable max would be around 120 km. That would give 2 more hours to enjoy the ride. And even throw in shorter stages to really enjoy the trip.

I've spent the last two days thinking about how to replan the trip to shorter stages, but there are really only two ways to do it... Either by adding more days, and that we don't have.. Or throwing more money at it by booking a flight to somewhere in Germany and take it from there instead... And thus destroying the whole idea of the adventure.

Today we decided to cancel the Stelvio 2019 as I am not there yet.. I've made significant progress since chemo ended in January, but there are still ways to go until I am at a fitness level where I can enjoy the trip.

The purpose of the general repetition was to find out things that work and things that do not. And evidently my body is just not there yet. I've impressed myself by managing this 3 day trip where I really pushed myself to my limits, but I really reached the limits and there is no need to force the Stelvio trip this year.

On a positive side, the planning and all the work put in on the bike and in the gym to get me into so good shape that I was able to complete this 3 day trip is all thanks to me focusing on the Stelvio trip 100% instead of thinking about cancer and chemo. But 4 months after chemo is still 4 months after chemo.

But as I've already filed for a 3 week vacation with my manager at work, I will probably spend a lot of that time on the bike doing shorter trips. At least that is the plan today.
And plans can always change and be adapted!

Until next time!

Friday, April 5, 2019

Stelvio 2019 Project update, 54 days before departure


Time to post an update on how the Stelvio 2019 project is progressing.
Our departure date is set to May 29th, a Wednesday in 54 days and ticking!

Fitness progress

Even though I tried to keep myself active during 2018, the two major surgeries and six months of chemo took their toll.

And that is why this is the one single thing that I am afraid of for the whole trip. To not be able to enjoy it because I'm not in good enough form. Not being able to complete the daily dosage of road. And that is why this is the part that I focus on the most and try to work on every day.

(We had a chat about it, and decided that there would be no shame to take the train to skip a leg or two of the trip if my health/fitness or whatever becomes a problem. But the goal is to cycle to distance, so that is really a last resort. But yeah, we will try to make adult decisions...)

I wrote the following two articles while on chemo

and I think that my stubbornness on doing the training sessions no matter how I felt actually made the treatment period easier in the end. Easier in this context is very relative.
The last two chemo cycles really took their toll and in January when I received the all clear from my doctors I was pretty much at the bottom of a pit, both mentally and physically. The nausea continued for some weeks after treatment and tiredness hung on for ... well it still does.. I am beat every day when I come home from work. But at least I am back to doing full days, I can always sleep when I come home.

I am glad that I have friends that push me to the gym for my deadlift session every week. Last week I did my person best at 140 kg. The explosiveness is starting to come back, what I struggle with now is endurance.
Hence commuting!

Commuting

The last 3 week I've commuted to work 5 times with my Kona Sutra. In the mornings it is 30 km slightly uphill and in the afternoons it is slightly downhill.


Morning commute, slightly uphill.

Afternoon commute, slightly downhill
It takes me around 1.5 hours in the mornings, I've done it in 1... My favorite segment is the steep part around 21 km in.. The segment is 1.3 km long and the 2.3% average gradient may not sound like much, and normally it's not. My old record average speed is 23 km/h... My best this year is 14 km/h...

In the afternoons it takes around 1 hour and 10 minutes.. I've done it in 50 minutes...

But numbers aside, it feels great to be back on the bike and outdoors! Started to grow tired of the trainer in the cellar!

Interval session comparison

One of the hardest sessions in my training program are the HIIT sessions on my trainer.
They consist of 30 second max, 30 second rest... 5 times and then a longer rest of 4 minutes and then 5 more times. In total with warm-up and cool-down its 20 minutes of hell.

Date Distance (km) Average speed (km/h) Max speed (km/h) Average Heart Rate (bpm) Max Heart Rate (bpm)
11:50 on Sunday, 31 March 2019 7.90 23.5 42.5 167 195
18:38 on Wednesday, 13 March 2019 8.02 23.8 45.7 168 191
10:56 on Saturday, 29 December 2018 7.15 19.6 46.1 164 194
14:48 on Wednesday, 12 September 2018 7.60 20.4 45.0 163 190
17:50 on Thursday, 9 November 2017 10.06 29.9 51.5 171 193

The last row is from 2 months before I got the news that I had cancer. The output went down after the surgeries and the training with chemo kept the level but no gains. (I don't own power meter so I don't see watts).
Bold dates are during the chemo treatment. The italic ones are now, after treatment. Starting to move in the right direction at least!

Weight progress

I've weighted quite a lot for the last 10 years, 100+ kg to be exact. At best six months before the first treatment with 97 kg.. During the treatments I weighed in at 103... all the time... But now afterwards there was a jump up to 113 kg some weeks ago!
I don't know what is going on, but hopefully the increase in training dosage manages to counter the trend.. Today I weighted in at 109 kg.

Gear progress

One of the biggest parts of the project budget was the bike, and it arrived in February. The second biggest part of the budget is all the other gear that I did not own. 

Things that I am still missing and need to be bought
  • Second cycling jersey
  • Power bank
  • Dry/compression bag for the tent to compress its size
  • Airplane ticket home from Venice
Trying to keep the list to bare necessities, but yeah.. We'll see how that goes.. Do I need a pumpsack for the sleeping mat? Probably not... Will I buy one? Maybe, haven't decided.

Next step

With 54 days to go, the schedule is ... well not that full to be honest. 
My plan is to continue 
  • commuting
  • strength sessions with deadlifts
  • other core training.
  • interval sessions
And in 3 weeks the plan is to do a general repetition. a 3 day bikepacking trip in Sweden to test our gear, mental health and endurance... 

Find all posts regarding Stelvio 2019

If you find this article interesting, please feel free to leave a comment or share it on social media!

Sunday, March 10, 2019

First impressions: Giro Rumble VR (2019)


The mountain-bike shoes that I have are from 1997 and they are a tad too tight for a comfortable longer ride. They have served their purpose in the dirt but now that I'm planning a bikepacking ride / bike tour through Europe I need something that I can wear every day both on and off the bike.

Disclaimer
I bought this product myself and this is my opinion on them. I am in no way affiliated with the manufacturer of this product. I like to link to other sites and I am not paid for that.

Why Giro Rumble VR?

Both my old MTB shoes and road shoes are Shimano and both shoes do their job but get a little uncomfortable after a few hours. My requirement for my trip is that the shoe must be comfortable for 6-10 hours per day, both on and off the bike. There is no need for performance, i.e. super sturdy soles are not what I am looking for this time.

I've been eyeing the Giro brand for some time now but never got around to test them. Especially as they design with laces instead of Velcro straps or boa.

So my requirements

  • The shoe must be walkable as I don't want to change shoes when I hop off the bike
  • Roomy and comfortable over performance. I.e. softer sole but still work well with SPD pedals.
  • They must look good
  • Maximum 100€ to fit into my budget
The shoes that got on my short list were the following:
As I already have looked at Giro shoes for my road bike I thought that this would be a good way to try out the brand.

Also I read the following reviews before buying the shoes

Size

This is the reason I rather buy shoes in a real world store. Sizing is just so random.
My 'normal' shoe-size is 44/45 EU.
My running shoes are 46 EU
My old MTB shoes are 44 EU (Shimano) and they are a tad too small, and my road shoes are 45 EU (Shimano) and they are a better fit..

The size chart provided by Giro really did nothing to help as the measurements were of the outside fo the shoe.. I.e. not the size of your foot. Very strange if you ask me.

After a lot of pondering I ended up ordering a pair in the size 45 EU hoping that they will fit.

Unpacking

The box is nothing special.. Does not even say that it contains the Rumble VR, just Giro.

Box opened and the left Giro Rumble VR is made visible.

A lot of stuff in the shoe that needs to be removed

The Vibram sole of a Giro Rumble VR. Looks walkable. Hope it is.

Trying on the left Giro Rumble VR. The sole feels a little more relaxed compared to my other cycling shoes but really stiff compared to my day to day sneakers.. Could work.

And in the bottom of the box is the manual for the shoes.

So nothing out of the ordinary here. Just a cardboard box with two shoes and an instruction manual..

And they fit like a glove. First impression is that there is room to move my toes and that is always a good thing.


Sole adjustments


I laughed a little when I saw that there was an instruction manual included. But luckily I eyes it through as it turns out that the Giro Rumbles come with an adjustable inner sole to get a good fit for the foot arch.

But nothing of it was included in the box. This seems to be just an advertisement to make you spend an additional 30€ on the Supernatural Fit Kit by Giro.

I am not impressed. Don't state that it is a manual for the thing you bought if it is just an advertisement for more stuff you manufacture. It is OK to include that as well, but just don't label it as an manual. This made me feel a little mislead.

Walking

I've done some walking indoors just to see how well they behave.

The Giro Rumble VR still feels a little clumsy when walking, the sole is flexible but not to the degree of an ordinary shoe. Compared to my other cycling shoes these walk great. The small degree of sole flex does make a difference.

The shoe laces

Ah yes. The shoe laces. The first negative thing that pops into mind is that it takes  a little bit longer to get the shoes on and off compared to Velcro/Boa.
There is an extra strap on the top of the shoes where you can attach the laces so that they don't get jumbled into the drive-chain.
But as the purpose of these shoes is to be comfortable I don't think that I will tie them as tight as my road shoes and thus there is no need for adjustments on the ride. We'll see what I think about them after some real use.


Update: -5°C - 10°C Early Spring Commuting

I've managed to put in some hours on my Kona Sutra the last couple of weeks while commuting to work. The shoes do behave good, but I had to drag neoprene overshoes over them to keep the warmth. The textile on the top of the shoes is thin... Almost a mesh. Meaning that they have a little too good ventilation for this time of year. But after sticking them into a pair of overshoes there was no more issues!
Really like the width of the shoes as well, no cramping from too tight shoes.

Update: 3 day bikepacking trip. 160 km per day

I thought I should update this after some long days in the saddle with together with these shoes.
First of all, I like them. Only negative I could say was that after around 6-7 hour park per day together with longer climbs with heavy packing, my feet started to numb. But honestly, that is pushing it. Until that point, they were more comfortable then my other cycling shoes (Shimano road and MTB shoes). The other shoes tend to start giving me problems after 2 hours, so 6-7 hours with these is a good rating.

And, we must count into this that I've not spent days in the saddle for a while as I was sick pretty much the whole 2018, this trip was pushing my limits far from my comfort zone. But still, numb feet after 7 hours is numb feet after 7 hours, I rather not get them at all.
Also at that point in time I started to feel the SPD pedal as well, it might just be that these shoes are a little more bendy then racing shoes, i.e. not as stiff and that's why the problems occur.

I have a bikefit booked in the next few days, might just be something that can be fixed. I'll update this when I know more.

The bikefit resulted in cleat move, and new innersoles. Felt a lot better, wish I'd done it earlier!


Wednesday, March 6, 2019

Choosing bike panniers: Arkel Orca 35


In this post I'll try to cover why I chose the Arkel Orca 35 bike panniers and my first thoughts on them directly after receiving them.

Why Arkel

My envisioned usage is:

  • Commuting to work (30km per way)
  • 3 day bikepacking trip with distances 165 km / day...
  • 3 week bikepacking/touring trip from Sweden to Stelvio and Venice this summer
  • More commuting to work and other bikepacking stuff that are not planned


Countless hours of research on different sites finally convinced me to buy Ortlieb Front Roller Plus... But then I spent even more time reading and found that Ortlieb seemed to have gone cheap and changed their bombproof parts to fragile based on various comments on mainly reddit (example).. I guess to sell more parts. So that quickly made me cross out Ortlieb from my short list...

I did not like the plastic look of Vaude or Thule panniers so that kind of removed them from my list as well... Call be picky.

Finally found this small Canadian firm called Arkel that seemed to get good reviews... Not many reviews, but good. So I decided to double the money spent on pannier bags and cut off on other stuff for the trip. Hope this gamble pays out in the long run!


Size consideration

I chose the 35 liter pair option. Arkel also sells 25 liter and 45 liter variants. One seemed a little too small for my needs and the later a tad too bulky. So I chose to go the middle way. Also, the 35 was tagged both front and rear pannier whereas the 45 was tagged rear only. I guess I could have mounted it on my front wheel but.. Yeah, probably a little too big.

My goal is to fit everything in these two bags and then strap my tent sideways over the Surly Front Rack.

Color options

There were two options, red or grey. I went for the grey variant as I want to be able to keep a low profile if needed.

Unpacking

Seems to be the correct product in the box... Arkel Orca 35

Arkel Orca 35 showing the mounting mechanism. Looks classy

At this point I started to panic. Only 1 Arkel Orca 35 bag in the box. I checked the included packing-order and it stated (pair).... What's going on here?

Unrolling the top of the bag to open it. Material feels like good quality (based on my limited experience with pannier materials). I.e not flimsy, but quite sturdy.

Opening the top, can see the side pocket. and glimpse something under it.

They packed one bag into the other to save space, genius. Feels a lot better : )

Arkel Orca 35, fitted on the Surly Front Rack on my Kona Sutra on the wall for storage

Unboxed and fitted on the bike.

Now I'll just have to wait for the weather to clear as spring turned back to winter here in Sweden.......


Update 2019-04-03, Early spring riding

Been riding with these to work when bike commuting. They do feel sturdy. The lock mechanism keeps them on the front rack and no clanking noise or anything that annoys.

I've managed to keep out of rain, but used them in -5°C, but there was no issues there. I was a little afraid that the fabric would become hard in below freezing temperatures but I did not notice anything like that.


Disclaimer
I bought this product myself and this is my opinion on them. I am in no way affiliated with the manufacturer of this product. Neither did I get paid to link to any site that is mentioned in this post. 

Wednesday, February 27, 2019

Review Kona Sutra 2019


My Kona Sutra finally arrived after some bad luck followed by some real luck!
I ordered it in September last year and as I am 190 cm long ended up with the size 58 frame that had longer delivery for some reason. After a lot of delays when the bike just never seemed to arrive at the bike store (they said mid January) I ended up canceling the order mid February as I found the bike in stock at another vendor... And lucky me, it was 150€ cheaper as well!

But now that I picked it up the other day and have spent the time on mounting racks and pedals I took it on its first ride in the wild!


My other posts in selecting a touring bike for my Stelvio 2019 adventure:

Setup for this review

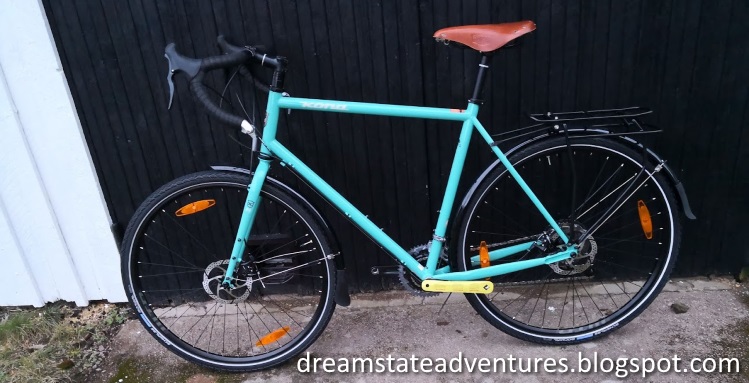
Kona Sutra, Surly Front Rack and Shimano PD-M545 pedals

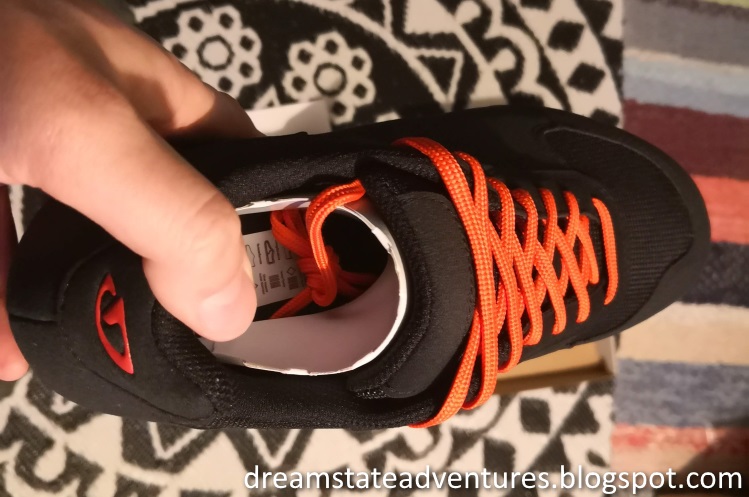
I put on my Surly Front Rack and removed the original back rack. The pedals of choice ended up being the Shimano PD-M545, basically dual sided SPD pedals with a platform in aluminium so that they can be used with ordinary shoes as well.


Test route

My first idea was to take the bike for a 100 km ride to see how it handles in a variety of situations, gravel and paved roads and climbs etc. But turns out that 4 weeks after chemotherapy ended, my bloods are still low and I had to rethink a more suitable ride.
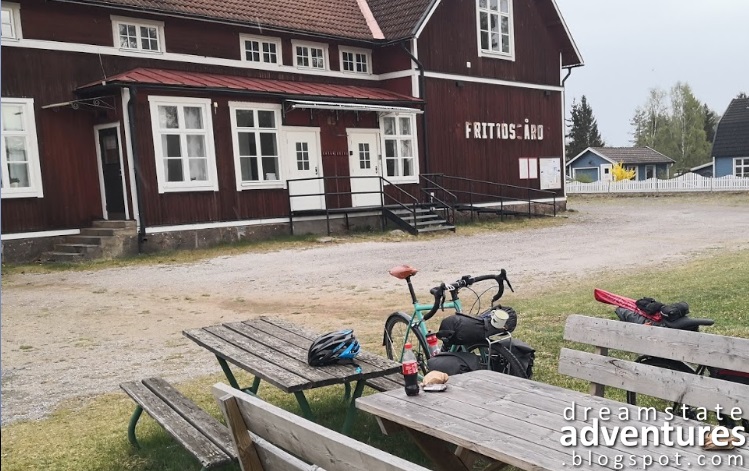
So instead I took the bike on two shorter rides. A mix of paved roads, gravel roads and some single-track (non-technical...)
No real climbs on the route besides some railway bridges..

Weight

I was unable to figure out how much this bike weighted before buying it. So now, in size 58 it is up to the test.

I used a hanging scale to weigh the bike, just lifted it up and hung it from the handle bar.
So the Kona Sutra 2019, with original back rack and no pedals weighs in at 14 - 14.5 kg at frame size 58.

Handling

Compared to my Scott Speedster S30, the Kona Sutra handles well. The shorter reach to the handle bar means that I can ride in a more comfortable position (more upright).

My first ride I ended up floating above the saddle as it was a little slippery, as well as me wearing bulky winter clothes. So not going to count that rides experience into this review.

The second ride the temperature was a little better and sun was out so I was able to just use arm and leg warmers and managed to take test the handling a little bit more.

Gravel

Started off with some packed gravel outside my house and the frame/tyres absorbed a lot of the vibrations resulting in a quite comfortable ride. I managed to push up the speed a bit and the few 90 degree curves on the route were taken with speed with no problems. The bike handled good and I felt like I had control all the way through.

Another section with a little bit more loose gravel/sand and the speed went down, no surprise there but with a little planning I had the correct gear in and there was no real trouble pushing through.

Single-track

The single-track sections of the ride were not technical, so I was able to keep a quite high speed through the sections and the bike felt quite agile through it all.
No problems to avoid mud-holes and it felt quite mountain-bike like in the handling. Only thing that could become a problem is that you have to change hand positions to change gear as the Kona Sutra did not come with STI levers as standard. This could lead to situations. But other than that I think it handled well and felt agile.

Paved road

Lastly, some paved road with varying quality.
On the smooth asphalt sections the Kona Sutra quite like my racer. Going down into the drops and keeping speed. In the 90 degree curves and intersections there was no problem.

Overall handling

Overall, I did not feel the extra weight of the bike to be a problem om the short test runs. The bike feels agile when you need to do quick turns or break, it gains speed fast and I did not think of frame flex when pushing.. it might be there, but I did not notice as I was having too much fun.

Breaking

The Tektro RRL-A levers together with the TRP Spyre C break calipers and the 160 mm rotors really got some stopping power.

The only bike that I've had that had disc breaks was my mountain bike (Focus Black Forest  29R LTD 1.0) that had Magura MT2. Those felt flimsy, made a lot of noise that I never got rid of after numerous adjustments and the Maguras didn't have that much stop in them. So compared to them, these mechanical (non-hydralic) breaks that the Kona Sutra comes with felt nice. They react the way I want them to and they stop the bike.
I did some 'emergency'-breaking from speed to zero and it stops... Even if I did not have any packing with me I weigh in at 105 kg so there is a lot of mass to stop.. But the Kona Sutra stopped when I wanted to. I'm confident that this will have enough stopping power for the Alps and hopefully I will lose some weight until then..

A note here that I had to adjust the front caliper with a 3 mm hex key and move the pads out from the disk (about a quarter turn) to remove initial scraping noise.

Shifting and gears

The bar end shifters on the Kona Sutra.
I've really grown fond of the STI levers on road bikes where the breaks and shifters are integrated. The Kona Sutra comes with separate break levers and then these bar-end gear shifters.
I've read that the reason is that they should be more durable. Might be true as they look super sturdy.
The default configuration on my bike was that the front derailleur shifter was not indexed, so just move the derailleur directly. This got some benefits as I really hate front derailleurs, there seems to always be a problem and scraping. But with this setup I can always fine tune the derailleur to not make noise. Me like.
The back shifter was indexed, makes sense as I would not want to try to find the gear on a cassette. The cable for the back derailleur came with a barrel adjuster mounted and readily available from the handle bars (see above picture, the slightly wider part of the cable casing to the top right).

The bike has a triple ring setup on the front derailleur and 9 indexed gears in back.
After my first short ride I had to adjust the barrel adjuster a quarter turn to get the indexing spot on.

As already stated above in the Handling section, the only issue I have with these is the fact that I have to move my hand from the hoods and away from the break-lever to change gear. I guess this is something that I can get used to but it could lead to incidents ..
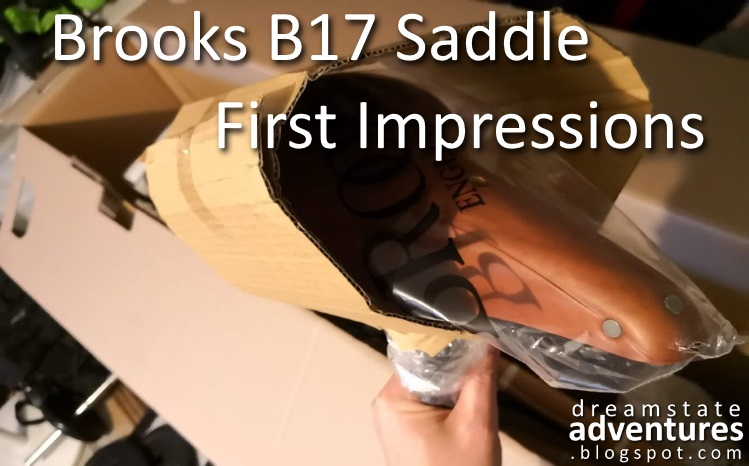
The saddle

First impressions on the Brooks B17. This is the first time that I've ridden a bike with a Brooks saddle. As I will be using the bike to cycle across Europe later this year a good saddle is required.

Don't forget to prep the saddle before your first ride with the included profide, thin layer on the top and rest on the under side, and don't forget the edges. Let stay for a night and then use some cloth to remove whatever is left on the top side. The under side should be left as it is.

Evidently this should be done from time to time and only time will tell if I manage to remember this. Also, there is a bolt that is used for keeping the leather tight. Just have to remember checking that from time to time as well.

My plan is to use padded bike shorts as that is what I am used to when cycling, I've heard that the Brooks is good to use without them as well but I like my cycling bibs so that is what I will go with.

On my first ride I had prepared the saddle the night before and before the ride I used some dry cloth on it just as instructed. But the whole ride I glided around and I was unable to stay in place for more then seconds..
On the second ride, 4 days later there was no problem with gliding. I might need to move the saddle forward 1 or 2 cm, but otherwise it felt nice. Too short rides to get a better opinion.

Tyres

The Kona Sutra came with Schwalbe Marathon Mondial 700x40c, Performance Line.

From the two short rides on varying surfaces I found that they work quite good.

Paved

Able to keep up speed and roll with no problems. Cornering felt good too.
I was afraid that there might be annoying noise, like mountain bike tyres tend to have when riding on paved roads. But the Mondials were quite quiet. Nothing to complain about.
Did not try them on wet surfaces yet.

Gravel

Able to corner with grip even at speeds.
Nice grip even on the more loser gravel/sand parts of the route.

Single-track

Did not try real muddy stuff, tried to not hit the deepest holes.
But riding over wet and slippery grass sections felt good. Wondered a little if I would lose grip when moving from left to right wheel track over the middle grass section on a tractor road but there was no problem.


I found a nice in depth review of these tyres at:


Simulated punctures

So I did not end up with punctures during the ride, but decided to test changing tubes both front and back just to get a feel how it all works with the through axle and Surly Front Rack and everything. Better to find out at home then somewhere in Germany or the Alps with no help available. Filed under 'Know your bike inside and out'.

I actually did this in my own back yard, so no harm if I failed this. But only gear used was the stuff that I planned to bring on a ride.

Oh and I found out that I actually like the thru axle system a lot more then the quick release one. The biggest gain was that you actually cannot place the wheel in place at a wrong angle (has happened) as the axle must go through the fork and hub to get to the other side. I like this a lot.

And there was no quick release handle, an eventual bad-guy would have to have a 5 mm hex key if he wanted to steal my front wheel. This is a good thing and one less thing to worry about.

Commuting, Early Spring Update (-5°C - 10°C)

I have a 30 km commute to and from work, giving a nice total of 60 km per day. Some uphill in the morning and downhill in the afternoon.
So far the Kona Sutra has handled well in minus degrees and as I am not in top form just yet the low gearing has helped me overcome the climbs up the hills.
The tyres roll well on asphalt and it has really been a joy to take the bike to work. And compared to taking my racer, I don't have to worry about traffic work and patches with no paving as the bike just rolls over any surface so far.


Conclusions

The good

An agile road bike that can handle quick maneuvering and breaking.
A lot of alternatives for cargo, i.e. prepared for both front and back racks and three bottle cages if needed. 

The bad

  • This thing is heavy, and I'll be climbing alps with it. Can't find anything else wrong with it so far. And really, I will be adding additional weight to it so in the end I think that as long as it's comfortable to ride....
  • Still unsure about the bar end gear shifters. Feels strange to not have the STI levers and having to move away from the breaks to change gear feels a little risky.

Final words

I am happy with the bike so far.
In the next few months my plan is to use this bike for both commuting to work and training.
The real test this year will be the General Repetition 3 day bike-packing trip in April and then Stelvio 2019, a 3 week bikepacking/tour in June. So after those two adventures I will for sure know what I think about the bike.


Disclaimer
I bought this product myself and this is my opinion on them. I am in no way affiliated with the manufacturer of this product. Neither did I get paid to link to any site that is mentioned in this post. 

Friday, February 15, 2019

Kona Sutra 2019 Finally arrives, unboxing and assembly


It finally arrived... After some delays and change of vendor I finally got the Kona Sutra 2019 yesterday.
If you are interested in why I chose the Kona Sutra for my Stelvio 2019 (and hopefully other) adventure,


In this post I will cover the unboxing of the package as I received the bike from a Post Nord delivery point (seems very hard to find touring bikes in actual physical shops in Sweden). I will also go through the final assembly that I ended up doing myself.

A big box, 165 cm long and 80 cm wide
The box that the Kona Sutra was delivered in was quite big, 165x85x30 cm, it just and just fit in my car (I could have chosen home delivery but then I would have had to wait another day....)

Box is open and you can spot this years Seafoam green in there. handlebar is not attached and the back rack visible. No saddle

My first Brooks leather saddle, nicely packaged and already mounted on the saddle post.
Stem needed to be redirected and fastened, shifters and brake leavers were already attached to the handlebars.
Tools needed, 3, 4 and 5 mm hex keys... Here to attach handlebars to stem

Saddle and handlebars in place, starting to take form and now able to attach to my workstand. Sorry for the clutter in the background, it's a crowded training/storage/workshop room! : )


The mud guards are plastic (only part that feels cheap). Front wheel attached. You will need a 5 mm hex for the through axle and 3 mm hex to fine tune the break pad distance.I.e. to remove scraping sounds..


With all parts attached (no pedals) the Kona Sutra 2019 weighs in at 14.5 kg for a size 58 frame. The weight of a Kona Sutra was impossible to find before buying the bike. So I hope this helps someone else in their decision making!
Kona Sutra 2019 with all delivered parts assembled. I.e. no pedals but with a back rack

At this point the bike is in its original state. All stuff from Kona attached. I recommend you to go through all bolts and nuts on the bike to tighten them before going for a ride. Found that half of them were not tightened.


Pedals

I chose the Shimano PD-M545 pedals for my Kona Sutra 2019. Mostly as I want SPD pedals but still have the option to use normal shoes on days when my feet are tired (or to ride to the store when home).


Unboxed Shimano PD-M545 pedals.  I was a little stressed when chosing, could have saved 100g and 100 SEK by selecting the rubber/plastic platform instead of the aluminium one... But bikester only had 1 bike left in store and I really wanted it!

Racks

I removed the standard back pannier rack and attached my Surly Cromoly Front Rack 2.0 Silver instead as my plan is to only go with a pair of front panniers.

Finished. My brand new Kona Sutra 2019 with Shimano PD-M545 pedals and a Surly front rack


First thoughts

Riding up and down the street with hex keys in hand to adjust saddle height and fork etc.
At this point I've pretty much just done the final assembly and ridden the bike up and down the street to fine tune saddle and handle bar / fork angle.

But the very first thought was, yes this was a good choice!

Disclaimer
I bought this product myself and this is my opinion on them. I am in no way affiliated with the manufacturer of this product. Neither did I get paid to link to any site that is mentioned in this post. 

Featured Post

ON Cloudventure Waterproof, walking on clouds.

In preparation for this fall I decided to invest in a new pair of shoes that would keep my feet happy and dry even during wet conditions. Fo...